’tis the season of hard cooked eggs in the shell, and there seems to be a variety of cooking methods! Now, if the main recognized purpose is festive food coloring, the insides don’t matter too much. However, if anyone other than the resident pet is going to eat them, perhaps there is a “best” method?
Initial observation: There are many methods of producing hard-cooked eggs!
Question: Which method produces the tastiest final egg? Additionally, as a bonus “holiday themed” query, do different methods of cooking influence color uptake by the shell when coloring eggs?
Expectation: based on previous experience I expect a distinct difference in egg white texture, yolk color, and peel-ability. However, it is unknown how the different methods will rank in qualitative tests. I expect that dye differences will be most pronounced between the dry egg cooking techniques (baking) and wet techniques (steamed or poached).
Equipment & Materials:
- white-shelled, large, eggs (2 dozen)
- scale (we used the AMW-2000 Digital Kitchen Scale
)
- pencil
- pots with water
- steamer basket or insert
- stove & oven
- electric kettle (specifically I used a:Proctor Silex Cordless 1.7 Litre Kettle
)
- bowl of cold water with snow (…or ice cubes)
- optional: instant read thermometer
- optional holiday bonus: liquid food coloring, white vinegar, boiling water, small bowls
- references:Good Eats: The Early Years
, Good Eats 2: The Middle Years
, Good Eats 3: The Later Years
Methods:
Slate recently published a piece about how we have all been cooking eggs wrong, in that eggs are often aggressively boiled for 10-20 minutes. The method proposed by Slate will be examined, along with my parents’ preferred method of hard-cooking eggs (Alton version 1, but oddly not in the first Good Eats book), eggs done in an electric kettle (from Good Eats: The Later Years, pg 42), steamed eggs (also in Good Eats: the Middle Years, pg 177 as a side-note, and in this Alton Brown video), and Alton Brown’s baked eggs.
Eggs were purchased on March 29. Package date indicates eggs were packaged on the 78th day of the year (March 19), so the eggs used in this experiment were ~11 days old at the time of the trials. At the start of the cooking process, all eggs were at room temperature.
All eggs were massed, and the mass was written on the egg with a 4B pencil.
Eggs were labeled based on their initial carton (1 & 2), and then half of the population was swapped into the other carton. One carton was then laid on its side for 3 hours. According to Alton Brown, eggs stored on their side should maintain a centered yolk (although, he suggests a full 12 hours at least). These side-rested eggs were further labeled with an “S”.
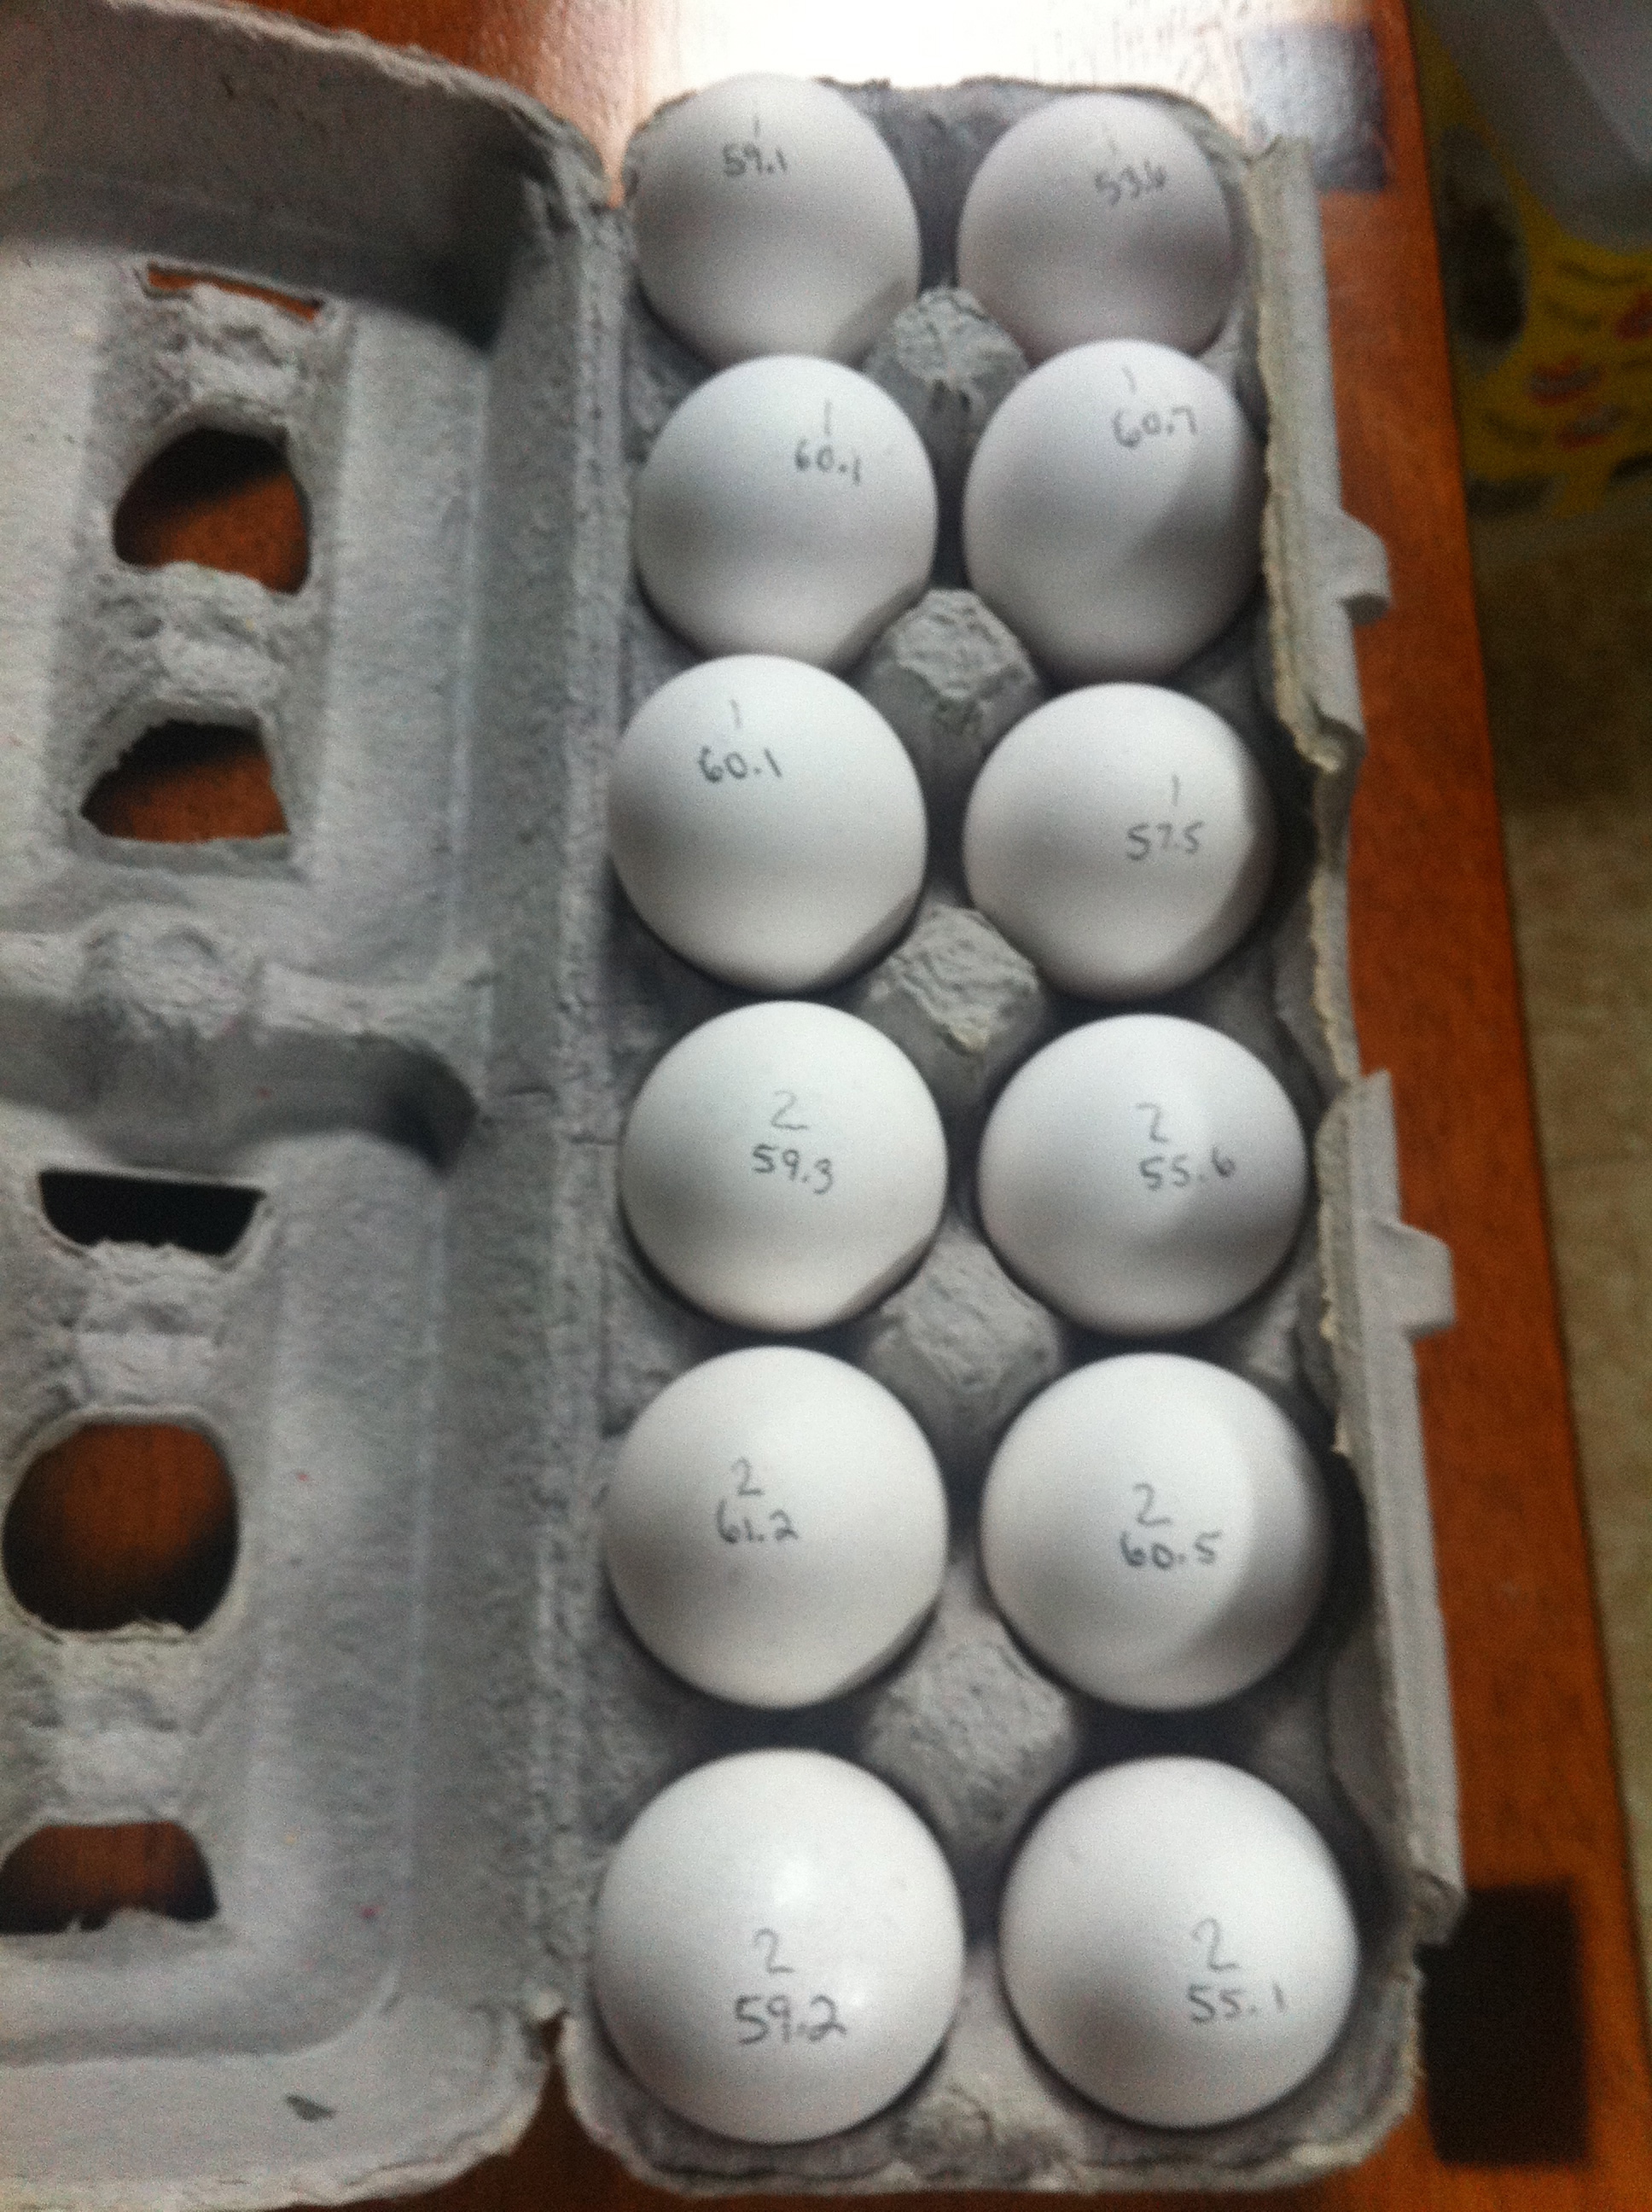
Eggs labeled with their mass and initial carton number.
Due to the variable times given for the Slate and Steaming methods, 6 eggs were used for each. Two eggs were cooked for each cooking duration used, and the time was written on the side of each egg.
Procedure:
- NOTE: After each cooking method all eggs were removed to an ice-water bath for 5 min. (or, you know, use snow like I did if your yard is still graced with the white stuff). After 5 minutes, eggs were placed in the refrigerator. Append these steps to EACH method below. For methods with multiple cooking times, eggs were moved sequentially into, and out of, the ice-bath, such that each egg only spent 5-minutes in the thermal shock treatment.
- Baked Method: place 4 eggs in separate compartments of a muffin tin. Bake for 30 min. in an oven that has been preheated to 325°F.
- Electric Kettle Method: Place 4 eggs in the bottom of an electric kettle. Fill with cold water to the 8-cup line. Turn on electric kettle. Once the kettle turns itself off, let eggs rest in the hot water for 12 minutes.
- Parental Method (really, Good Eats v. 1): Place 4 eggs in a small pan (I used a 2 Qt.), cover eggs with cold water (my eggs were covered by 1.5 cm, or ~0.5 inch, of water), and add 1 tsp. of table salt. Bring to low boil (determined to be 205°F using the instant read thermometer), remove from heat, cover, let sit for 15 minutes.
- The Slate Method: Place 6 eggs in a pan (I used a 5.5 Qt.) with cold tap water, such that the water covers the eggs by 4 cm (~1.5 inches, original recipe states 2″, but my pan was not deep enough). Bring water to a low boil (205°F), remove from heat, cover pan, and let sit. Pairs of eggs were removed after resting for 9, 11, and 13 minutes.
- Steaming Method: Place 6 eggs in a steamer basket, over a pot of boiling water. Cover and steam pairs of eggs for 10, 12, and 14 minutes.
- Eggs were left to cool in the refrigerator for at least 1 hour.
- (Optional) Create egg dye following package instructions. I used 10-20 drops of liquid food coloring, 1 tsp. white vinegar, and 1/2 cup boiling water.
- When the eggs are cool, peel samples from each technique, cut in half, & taste test. Take notes of ease of peeling, texture & color of the yolk, and texture of the egg white. Note if there is any oxidation of the yolk (grey rim) or if there is any sulfurous odor.
Data:
Side resting for 3 hours did not significantly affect the placement of the yolks. In general though, no yolks were dramatically off center.
All of the eggs, except for those that were baked, were easy to moderately easy to peel. There seemed to be some egg variability that was separate from the cooking method, as the “Steamed: 12 minute” egg suffered some white loss (some of the egg white adhered to the shell and was peeled away from the rest of the egg) that was not observed in the 10 or 14 minute cooking times. Additionally, the yolk in the “Slate: 11 minute” sample was very firm, unlike the yolks in the 11 or 13 minute eggs.
The water depth differences between the Slate Method (4 cm) and the Parental Method (1.5 cm) did not seem to cause a difference in relative quality/doneness. It is believed that as long as the eggs are fully submerged they will cook properly (however, this sounds like a future experiment).
Mass:
- All eggs: average 58.1 g (median = 58.3 g), with a range from 53.5 g to 61.9 g.
- Carton 1: average 57.9 (median = 58.3 g), range 53.5 g to 61.1 g
- Carton 2:average 58.3 (median = 58.2 g), range 54.8 to 61.9
Qualitative Assessment of Taste: (listed in order of taster preference)
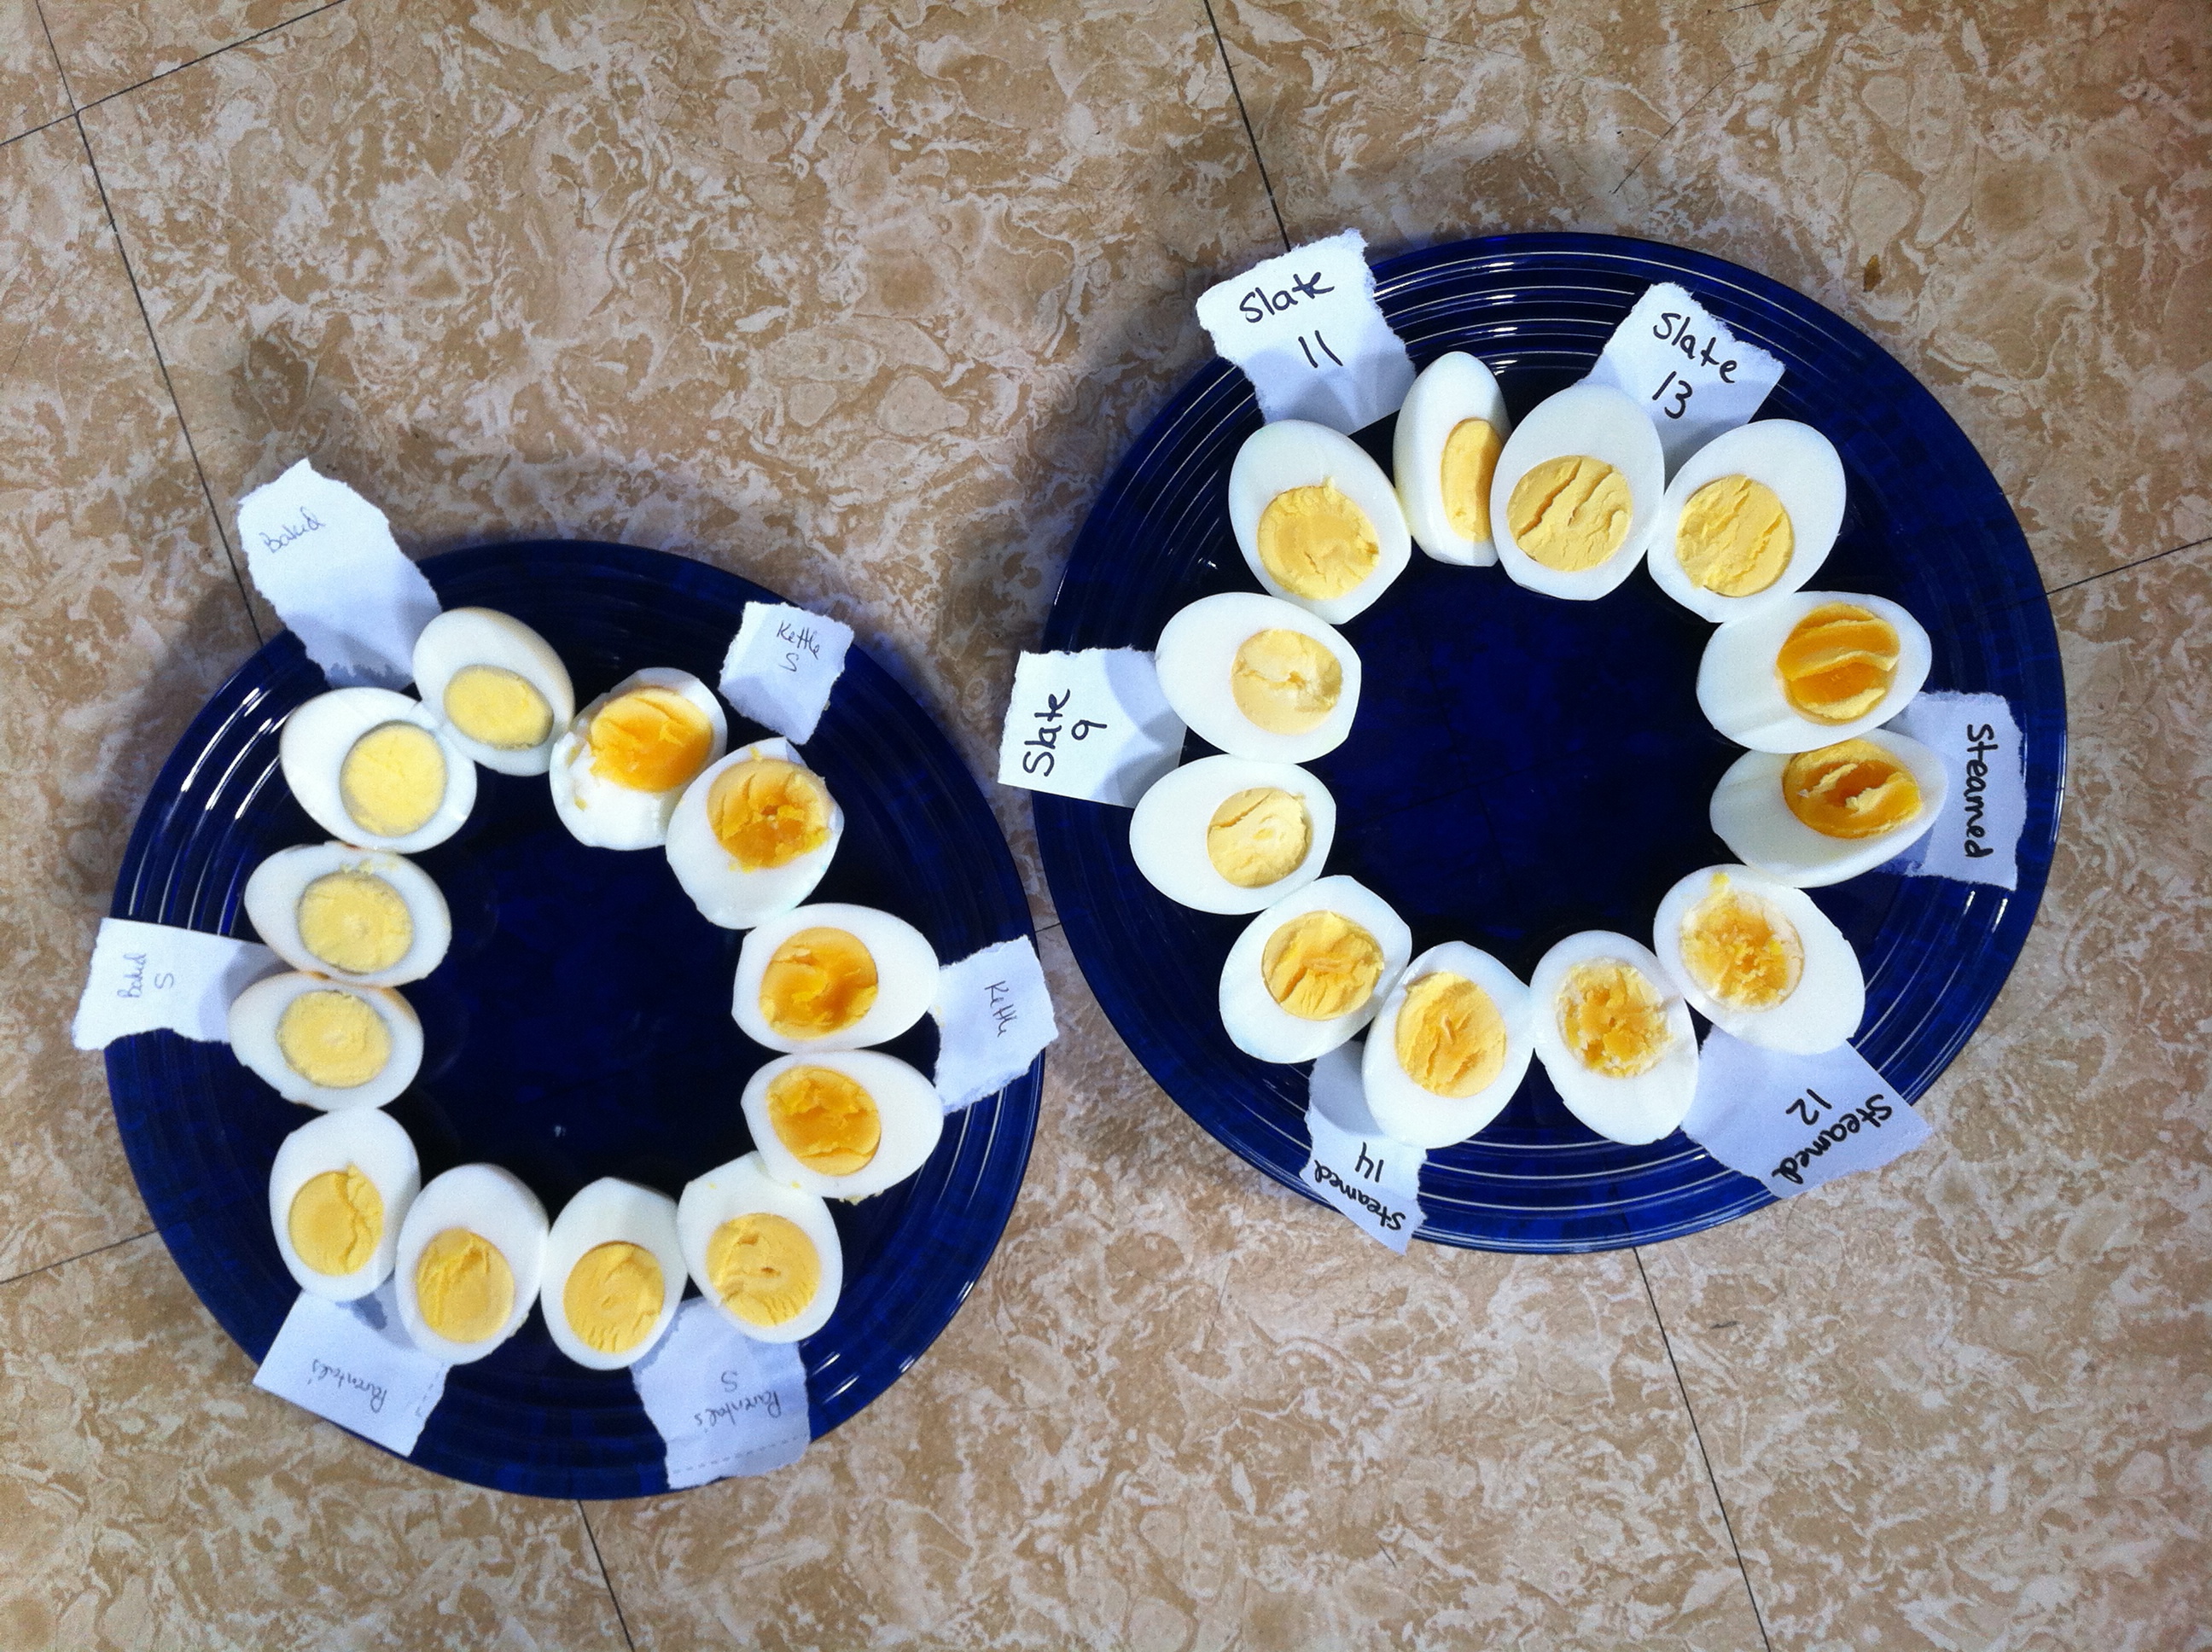
Eggs from each method and time experiment, cut in half and labeled. Labels with “S” on the left plate indicates that the egg had been side-rested for at least 3 hours before cooking. Labels with numbers on the right plate denote cooking duration in minutes. The “Steamed” label with the hidden number is the 10-minute trial.
- The Electric Kettle eggs were the favorite for eating in our taste test. The yolks could be considered underdone to some (but overall, the eggs are all more done that many traditional breakfast options), but the yolk was fully set and the egg had a nice flavor.
- The Slate and Parental eggs were very nice, especially if you want a homogenous-color yolk (i.e. the ones above freak you out). There was no noticeable difference between the salted (Parental) and non-salted (Slate) water, so the Parental version could simply be considered a 15-minute version. This method is very forgiving! The 9-minute eggs were fully cooked, and the 15-minute eggs (Parental) were good and lacked the grey-sulfur ring that indicates overcooking. The only noticeable difference from 9 to 15 minutes is a slight increase in dryness of the yolk, and a slight darkening of yolk color.
- The Steamed eggs had a very distinct gradient of doneness between 10 and 14 minutes. This technique seems temperamental and more likely to give unexpected results if you do not closely monitor the time. We found these somewhat bland, but egg-tasting fatigue had definitely set in by this point.
- The Baked eggs were the least favorite. The white was discolored, there was a distinct “Death Star” look to them (and, interestingly, a scorch mark on the opposite side of the large crater; see image below), and these were the only eggs that were over-done. Despite the grey rim on the yolk, there was no obvious sulfur odor. It is suspected that being overdone may be a side-effect of cooking only 4 eggs in a 12-muffin pan. The muffin-slots sans eggs may have become significantly hotter than they would with an egg in them, and may have led to the scorching + yolk oxidation.
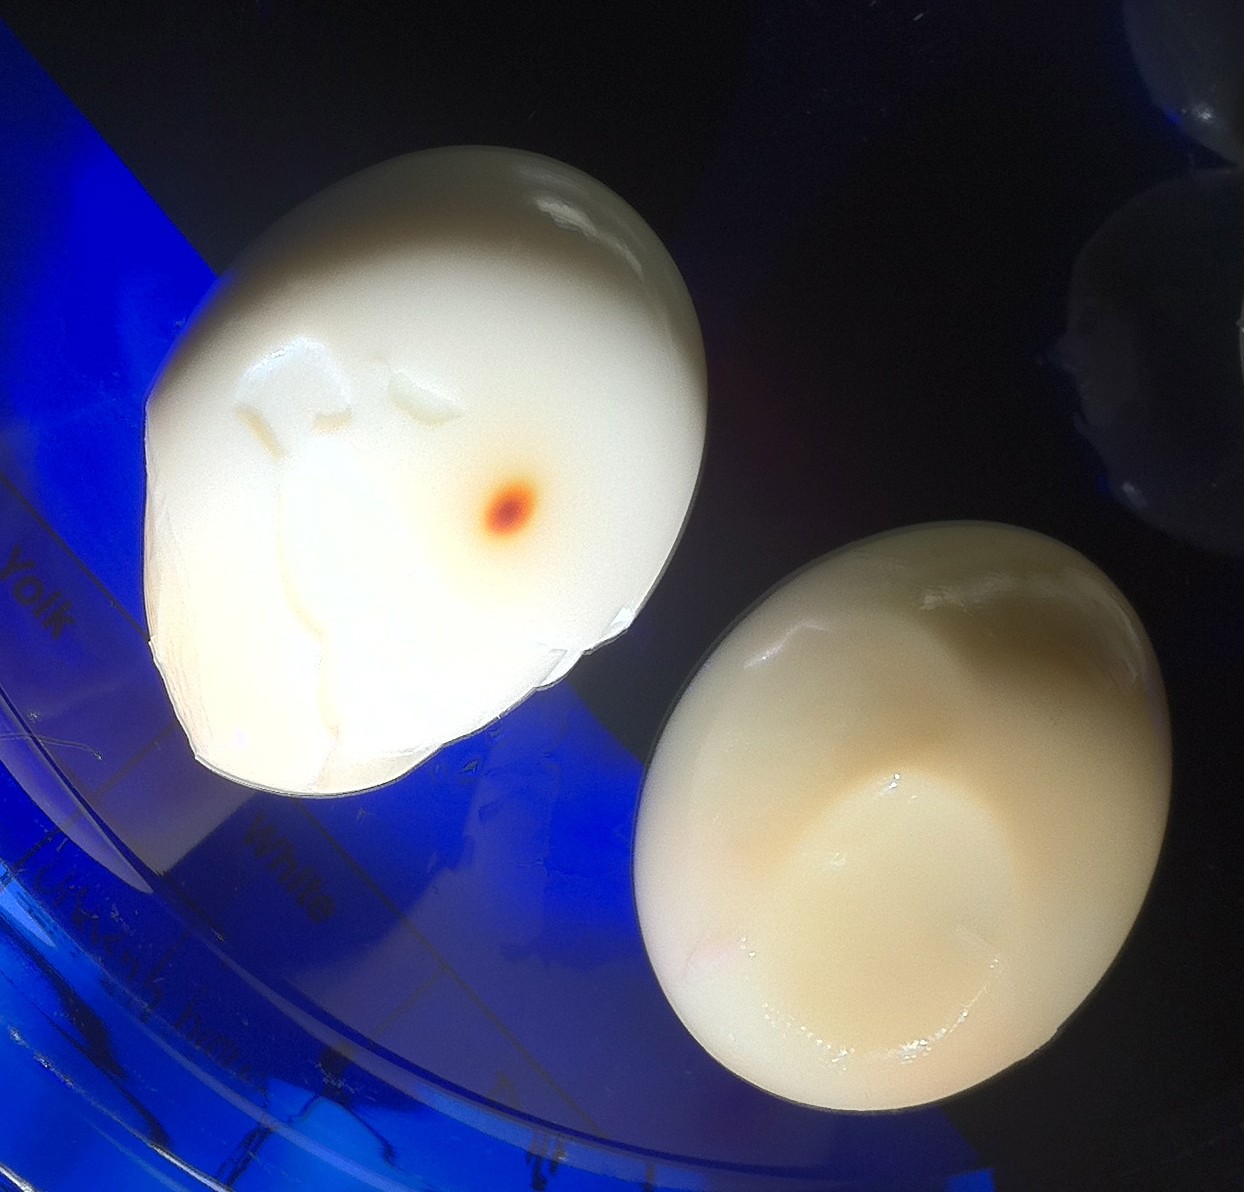
Peeled eggs from the Baking method. Note the “Death star” like crater, and brownish color, of the egg on the right. A small burn mark, like on the left egg, seems to exist on the opposite side of the egg from the large crater.
Color Uptake: No significant difference in color uptake was noted between the different cooking methods. Instead, color seemed to become less vibrant with sequential eggs. It is suspected that the decreasing temperature of the dye solution is the most obvious cause for differences in shade (see below). A general observation from this year, and previous egg dying experiences, is that single color dyes (red) seem to work better than composite colors (purple).

Eggs dyed with “Neon Pink” food coloring, arranged by usage of the color bath.
Surprise Results:
If you give a scientist 24 eggs to experiment with, they will use all 24 eggs…
The stains on my counter are most likely from the last time I dyed eggs (I’ve been wondering what those pink stains were…)
This phenomena:
Conclusion:
The electric kettle produced the tastiest eggs (based on our tastebuds and egg preferences), and would be a useful method of making a small number of hard-cooked eggs. The Slate Method works very well and seems to be very forgiving in terms of timing, and would be able to handle a large number of eggs at once. Cooking technique does not seem to significantly alter the coloration of the eggs when dyeing them.
Future Questions:
- how does prolonged side resting affect yolk placement in eggs?
- does baking eggs in a fully occupied muffin tin, or directly on the oven grate, produce better results?
- does water volume matter when “boiling” eggs, as long as the eggs are submerged?
- can consistent egg color be achieved by keeping egg dye warm (e.g. stove or hotplate)?
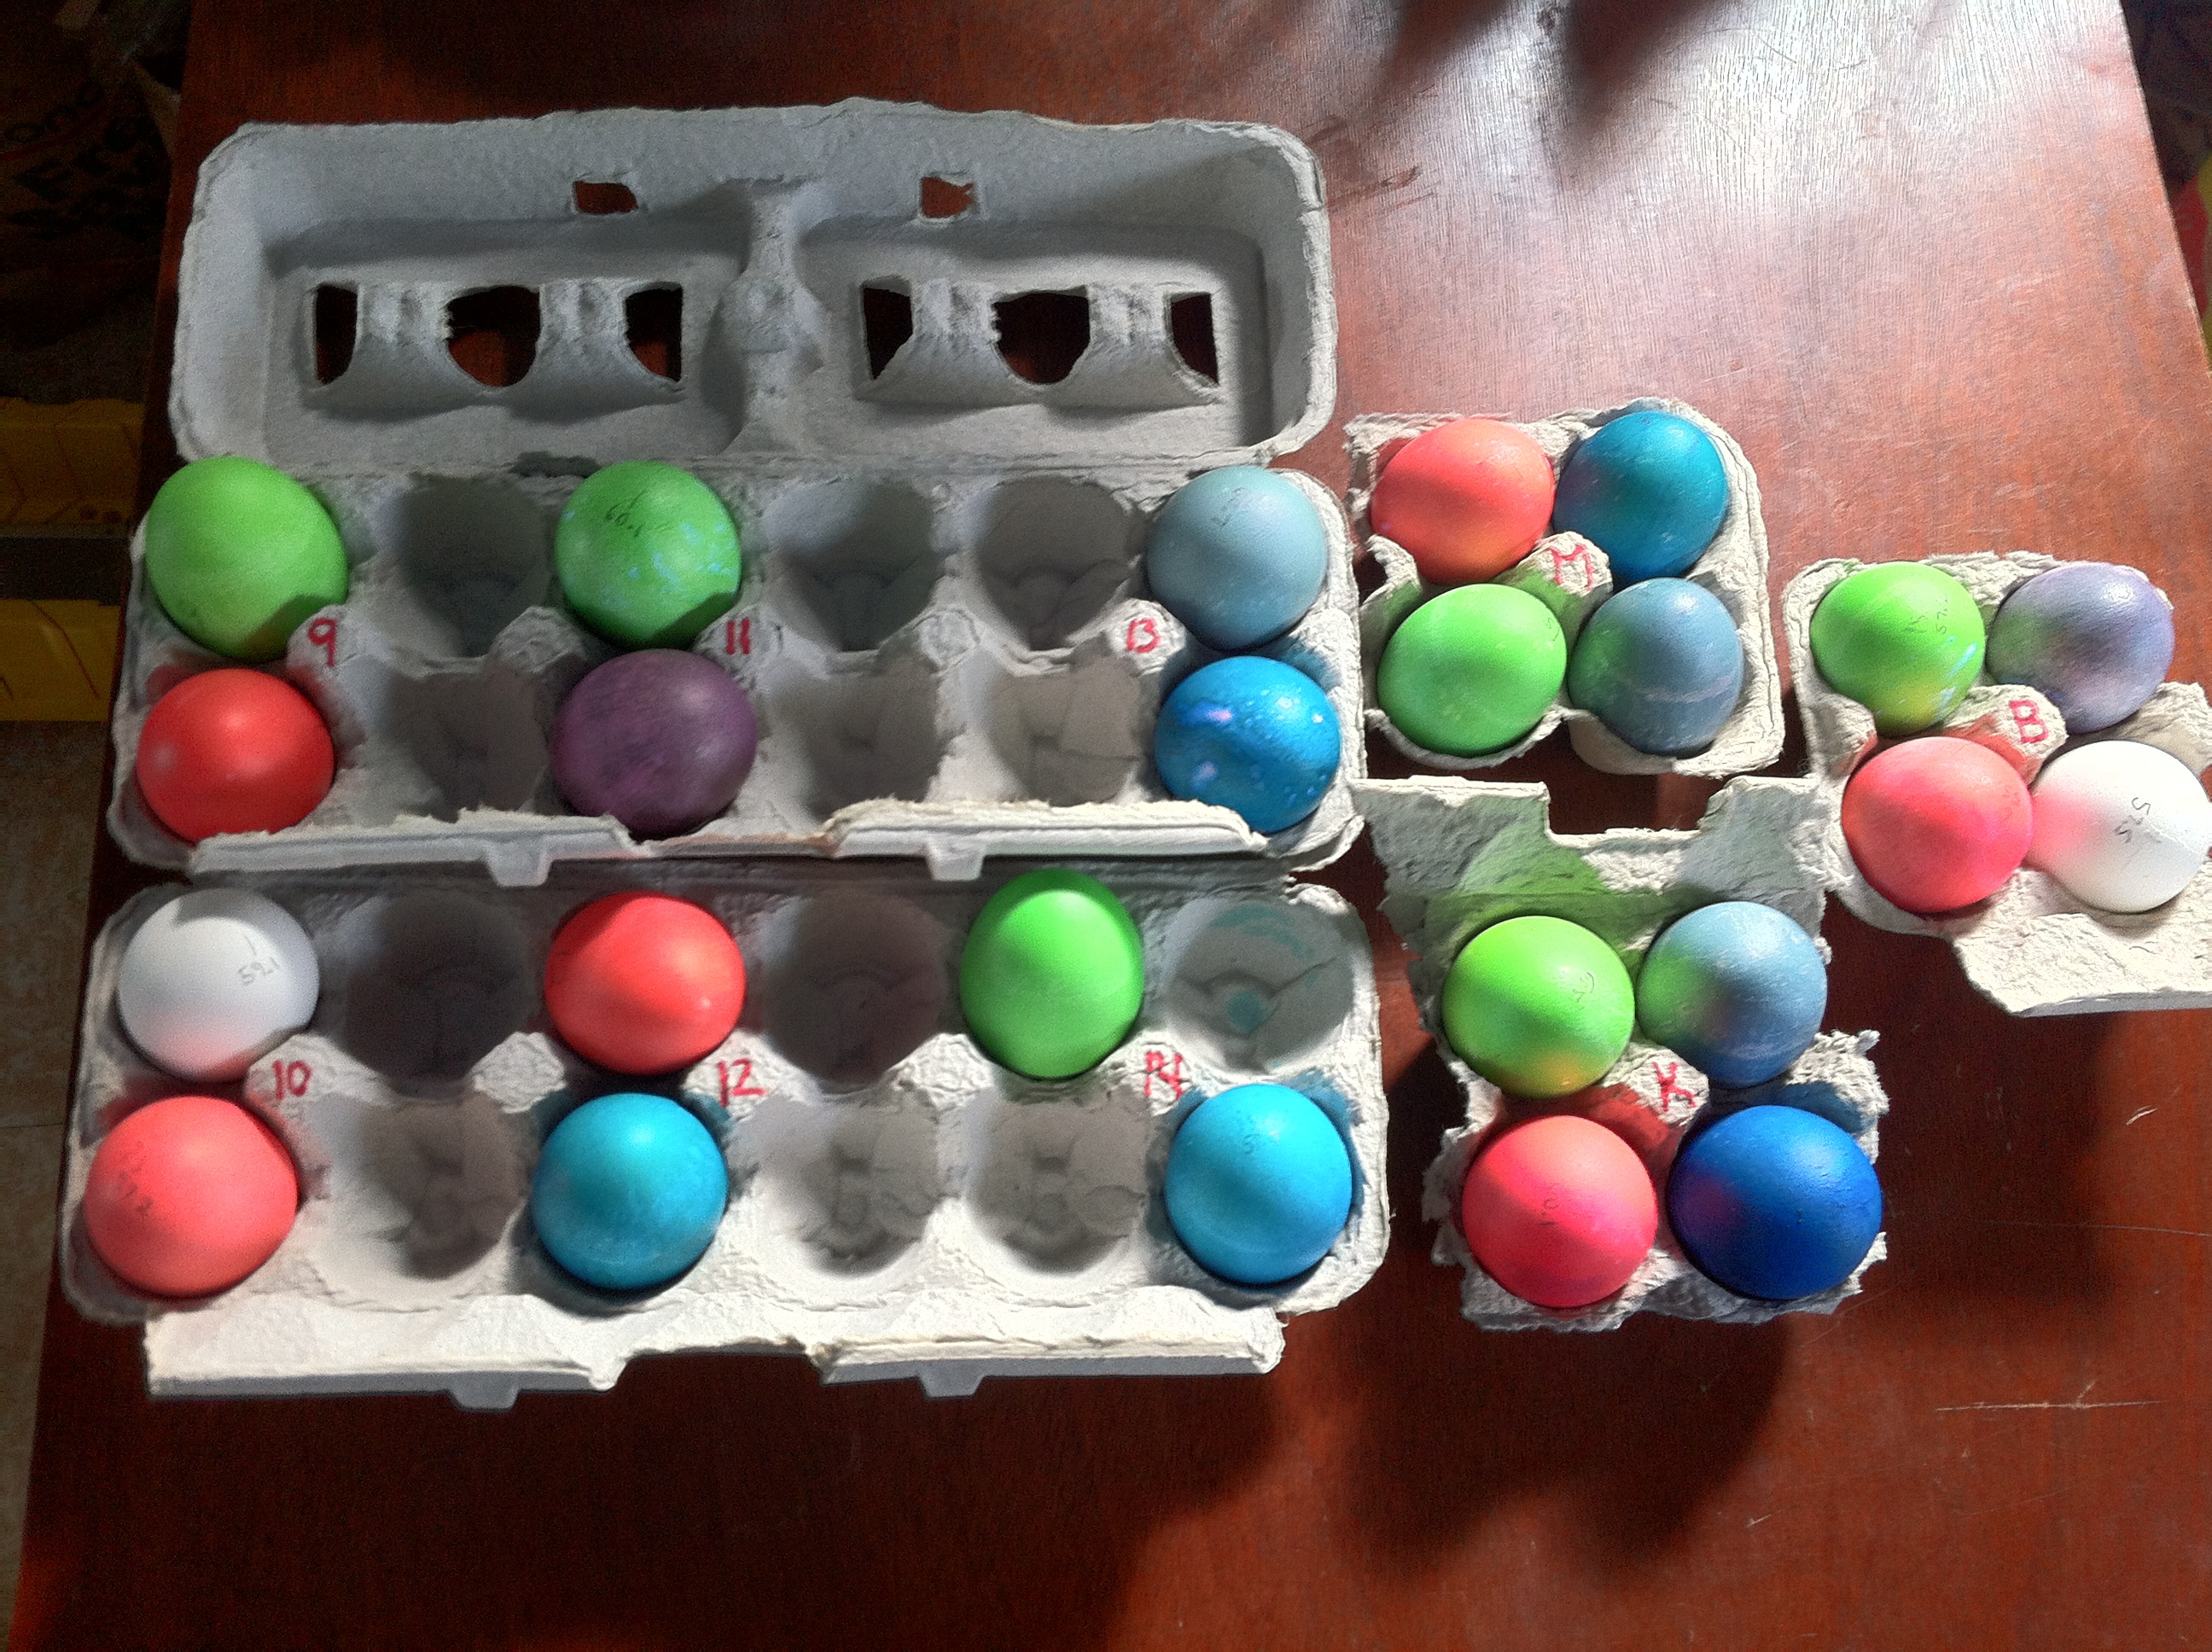
Eggs from all trials, after coloring

Love this blog! I am a Guide Leader in the UK (girls aged 10-13), they decided they want to do their Science Badge this term, is there anything fun you can come up with or recommend with just a pan on the stove? Or a microwave? Or just mixing different things together? Just things you can find in your normal cupboards…
I am glad that you are liking our blog! You can look at chemical reactions like making silly putty (http://video.about.com/chemistry/How-to-Make-Silly-Putty.htm) or “milk plastic” (http://www.youtube.com/watch?v=pIvAl4lu1uA) which can be cut into shapes, painted, & turned into decorations (http://www.instructables.com/id/Plastic-Milk/#intro). You could also look at processes like crystallization with rock candy or creating crystal sheets (The “window frost” project looks pretty fun to me! http://chemistry.about.com/od/crystalsforbeginners/tp/quickcrystalprojects.htm).
There are also density experiments; will hot water and cold water mix? Color one, or both different colors, and gently/slowly pour one onto the other (this works best using a container with clear sides). The hot water should float because it is less dense than the cold water. If you dissolve salt or sugar in water, that will make it denser than water of the same temperature, so it would sink. There are also experiments with heat in general such as convection, which is a good model for how the atmosphere, oceans, or mantle move (http://www.nasa.gov/centers/goddard/pdf/385552main_ConvectionInvestigation.pdf). And you can also make whirl-gigs to look at the rising of heated air (http://www.education.com/activity/article/stovetop-whirligig/).
My friend who does US girl scouts, dissolved the shells off of raw eggs by placing them in white vinegar (takes overnight), then put one de-shelled egg in water with food coloring, and another in a cup with corn syrup. In a few hours, due to osmosis, one egg swells but the other shrivels. Apparently the de-shelled eggs are pretty fun to play with, and her girls loved it.
Hiii! Those are all brilliant! I like the idea of the crystals but it looks like it takes a long time. Maybe I’ll experiment with the eggs at home 🙂 Thank you so much!!
Pingback: Egg-speriments take 2 ! | Doing Science To Stuff