How to mitigate basement flooding with a garden hose siphon.
Initial observation:
We had an impressive amount of snow this year (223.75″) and it has been melting FAST. This has led to significant flooding of the basement at the Primary Testing Facility, which was thankfully designed to be flooded (concrete floor, trenches to direct water to drain, etc…). My wonderful co-blogger realized that a siphon could be the ticket for keeping the basement clear. We have a pronounced slope between the house and the curb, which creates the gravitational differential needed.
Question:
Can our flooding be mitigated with a garden hose? What is the flow rate out of the basement when a siphon is set up? What flow rate is needed to keep the basement clear?
Equipment & Materials:
- flooded basement
- 1 garden hose (minimum)
- sprayer attachment with a flow cutoff
- sink, or some manner to fill the hose
- measuring cup with 4-cup capacity (we used an OXO Good Grips 4-Cup Angled Measuring Cup
)
- stopwatch or similarly equipped phone
Procedure:
- Run a hose from the flooded basement to the curb (or some location with a lower elevation than the flooded basement that will drain)
- Attach the sprayer attachment to the non-basement side of the hose
- Attach the basement end of the hose to a basement sink (if you don’t have a sink you could try to use a funnel and fill the house manually, or hold the hose under the flooded water & lift up several times to fill it)
- With the sprayer open, turn on the sink (this eliminates air from the hose)
- When water is flowing freely, close off the sprayer and turn off the water at the sink (quickly, or the pressure will cause much spraying from the hose-sink juncture)
- Detach the hose from the sink, cover the exposed end with your hand to prevent air from entering the hose
- Place hose end under the ponded water surface
- Detach the sprayer attachment from the hose on the down-hill side
- This should start the gravitational pulling of water through the hose – if so, congrats! you have a siphon!
- To determine the flow rate, measure how long it takes to fill a graduated measuring container
- For science, repeat step #10 ten times
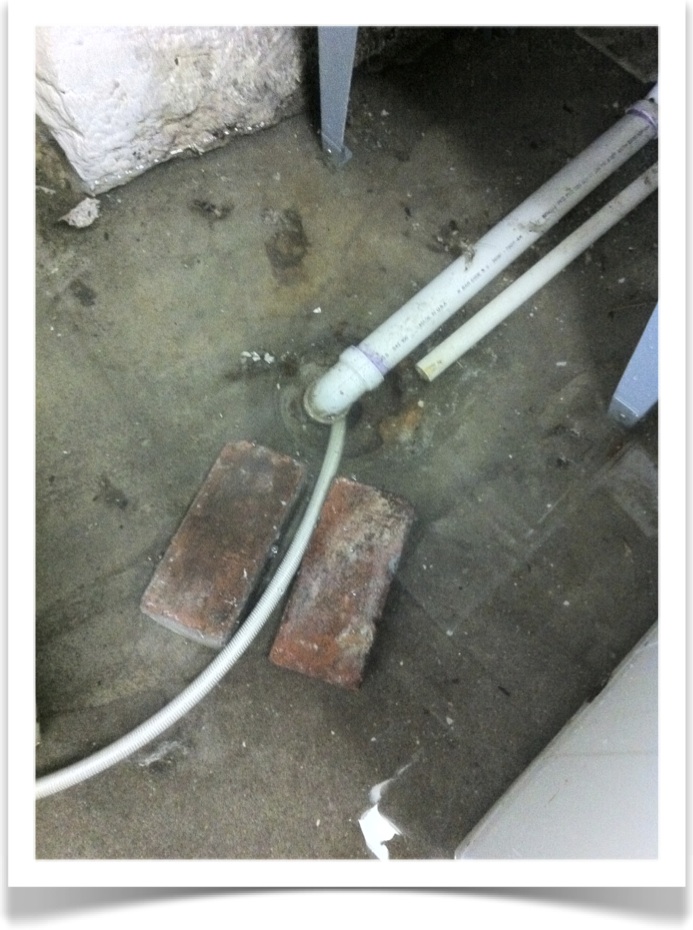
Hose #1 positioned to take water from the drowned basement drain. Bricks are there to keep the hose in place via friction.
Data:
1.13 gallons/min, average of 10 measurements (or an average of 13.27 seconds to fill a 4-cup measure).
The collected data produce a range of 1.11 – 1.15 gallons/min at a 95% confidence interval
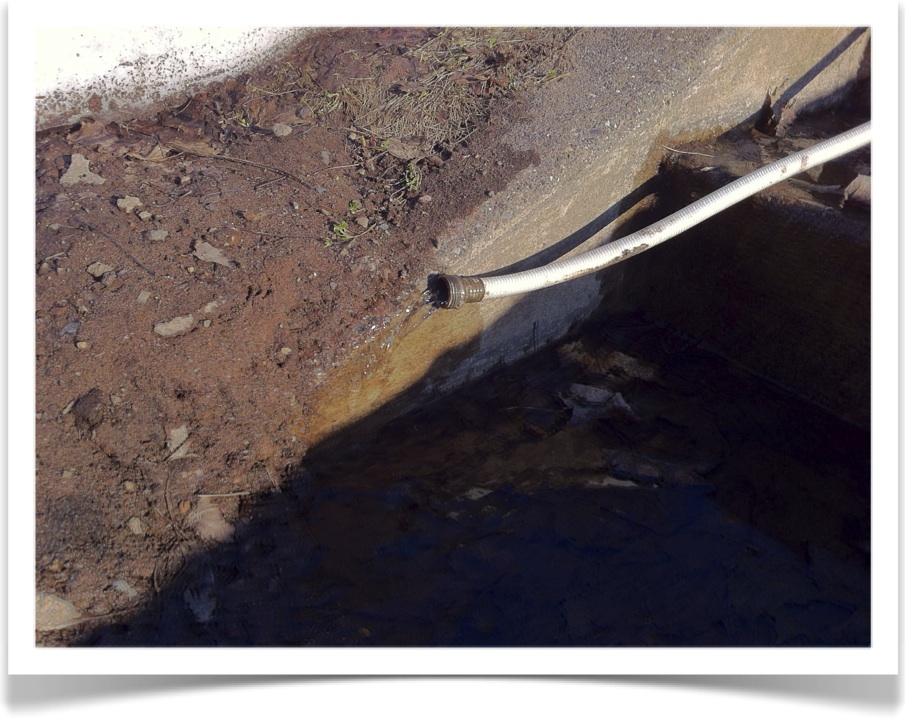
Hose #1 outlet flow. Outlet was positioned at an elevation lower than the basement, near the curb, to get water out of the house.
Surprise Results:
My snow boots ROCKED that 3″ of standing water. Dry socks = awesome!
Conclusion:
Basic physics provides an awesome solution to deal with a flooded basement. However, a single hose did not provide sufficient flow rate, and the water kept rising. When a second hose was installed in the same method, and the water still seemed to be creeping up, 2 new (longer) hoses were acquired thanks to some transportation help from brownie-master P. Having 3 hoses at the basement drain + 1 at the mysterious water-producing hole in our basement floor, we had the basement under control in about 30 minutes. Two hoses were taken offline, and two were left operating near where the water was entering the basement. Apparently, somewhere between 4-5 gallons/min of drainage was needed to clear the ponded water, but 2-3 gallons/min was sufficient to keep the pond from re-forming.
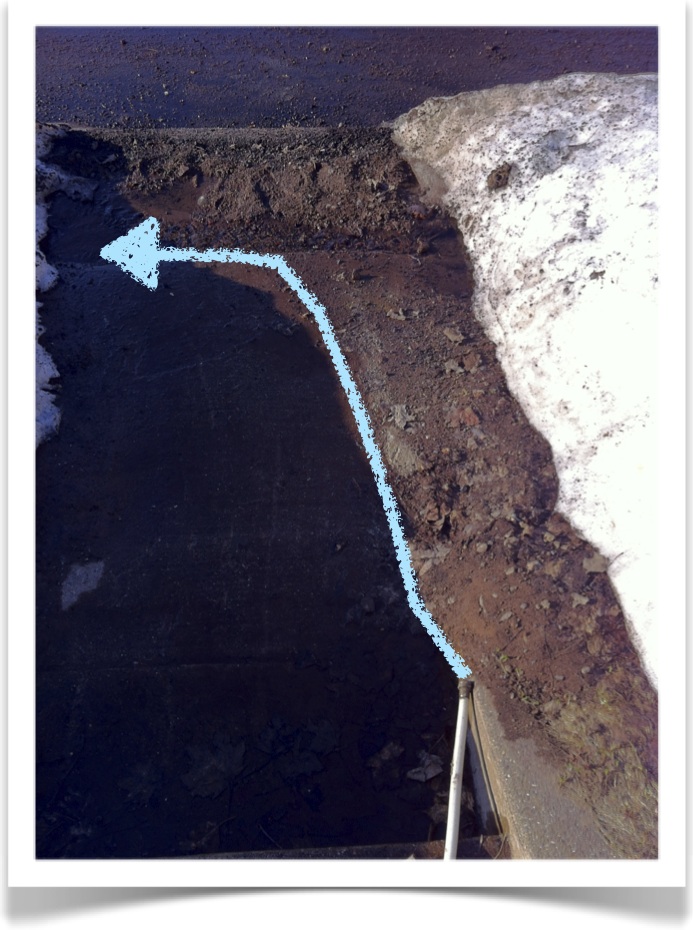
Hose outlet at a lower elevation than the basement floor, with a blue arrow indicating water flow. The flow of water inside the curb is interesting, but it seems to make it to the street/proper storm drainage eventually.

Siphons are the best. Science!
Good experiment! We didn’t have that much snow, but did have a good eight inch rain last week. We let the cats play in the trickling water and turned on the dehumidifier. Took care of it overnight.
I don’t understand this. Good job I live high up where I don’t get flooding.
We live pretty high up, so we don’t have to worry about river flooding, but the basement is below ground level, and the slope between the back and front yards seems to encourage ground water from rapid melts or heavy rains to come in.
But essentially, if you can fill a hose full of water, and bring one end of the hose to a lower elevation than the hose in the basement, gravity will cause the water to run out of the hose. If the end of the hose in the basement is submerged, instead of sucking air through the hose as the water empties out the other end, it will start to suck the ponded water – ta-da! a siphon!
Does that make sense? It’s a pretty common technique for cleaning fish tanks, brewing beer/wine, or removing gas from a car’s tank… We’ve just applied it on a larger scale.