Since our previous attempts at 3D printing a siphon to make a layered beverage, there have many advancements in the world of 3D printing, the most significant of which is the release of the Prusa XL with its multiple print heads. So, we figured it was high time to try printing some new siphons with newer technologies.
Here we try to make a new, hopefully better, version of the mini siphon for making layered shots.
Background:
There were two primary goals of this iteration. The first goal was to refamiliarize myself with Fusion 360, as it had been nearly four years since I had last used it. The second goal was to familiarize myself with the relevant capabilities of the Prusa XL.
Design:
In addition to the main goals, I also wanted to make a few design changes, based on what had been learned from the Mk I. Among these are moving the vent pipe to the edge of the reservoir and increasing the siphon pipe diameter. Additionally, the intersection of the siphon and vent pipes is now tangential instead of perpendicular. Below are cross sections of the new Mk II siphon.
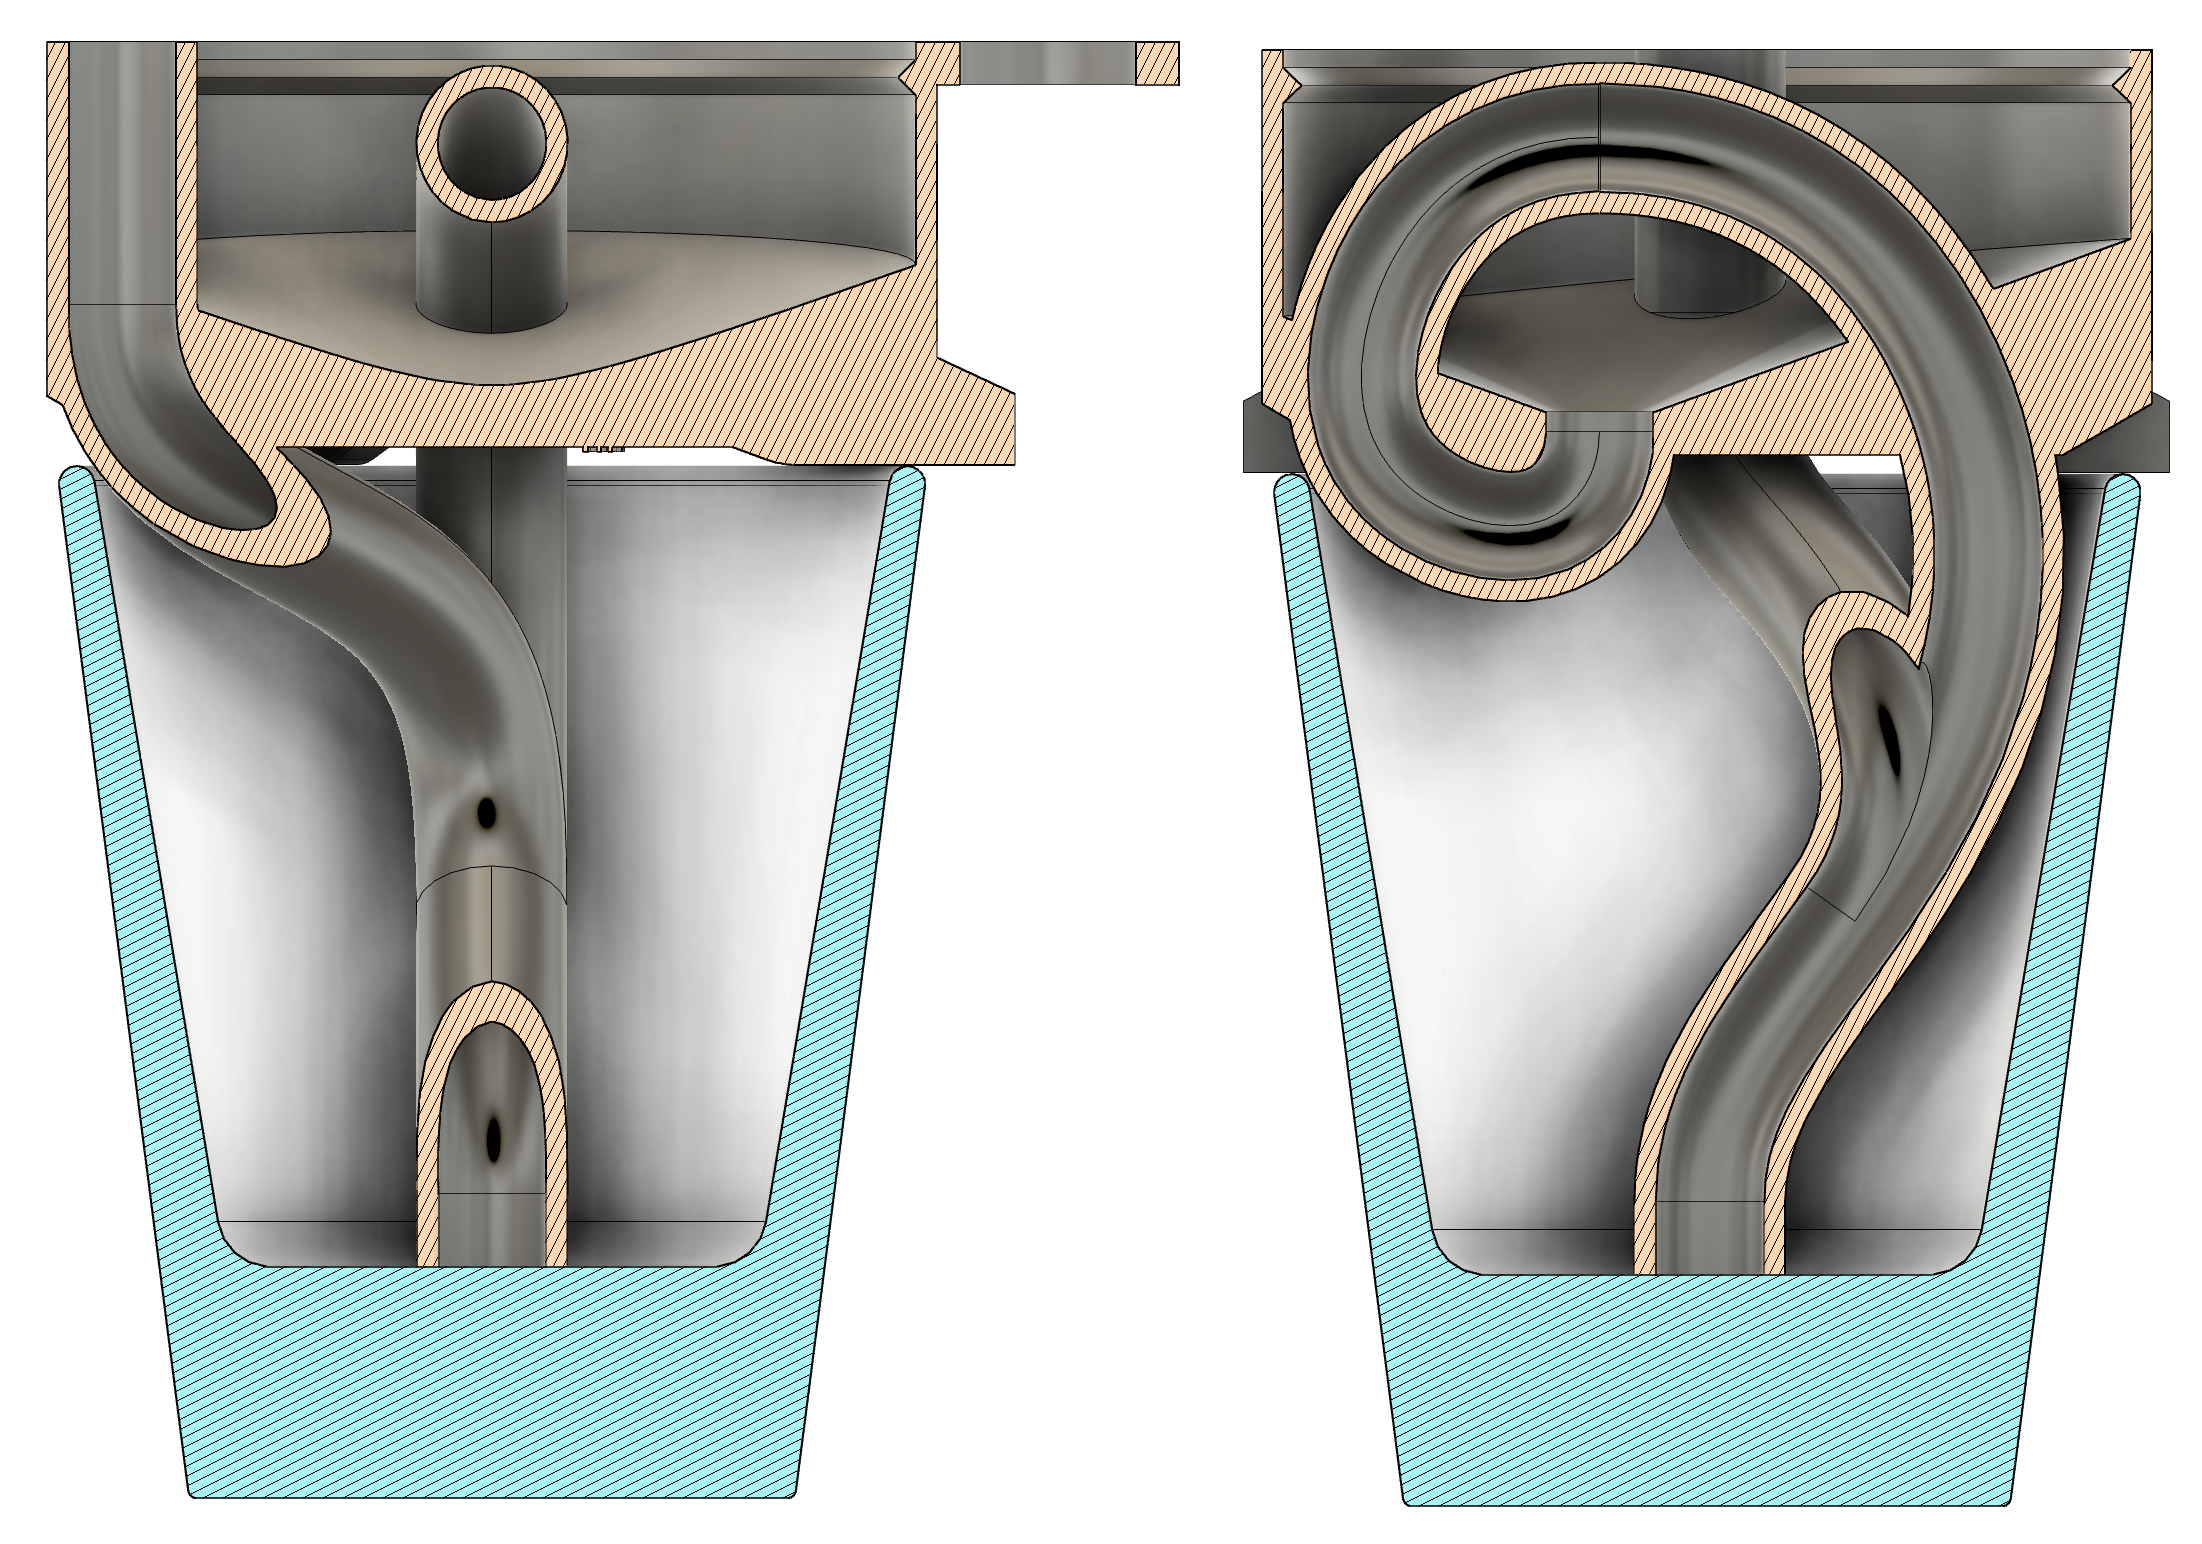
Cross section of the Mini Mk II siphon.
Slicing & Printing:
The previous models had been sliced using Cura Lulzbot Edition and printed on a LulzBot TAZ 6, while the new model was sliced using PrusaSlicer and printed on a Prusa XL.
Below is a table summarizing the more significant differences between the Mk I and the Mk II.
| Mk I | Mk II | |
| Slicer | Cura Lulzbot Edition | PrusaSlicer 2.7.4 |
| Printer | LulzBot TAZ 6 | Prusa XL |
| Filament | copolyester | PCTG |
| Support Shape | Zig Zag | Organic |
| Support matrerial | copolyester | PCTG |
| Support interface | copolyester | PLA |
| Nozzle Size | 1.2mm | 0.4mm |
| Layer Height | 0.6mm | 0.3mm |
| Print Orientation | inverted | on side |
| Siphon diameter (inner) | 3mm | 6.1mm |
| Siphon diameter (outer) | 6mm | 8.5mm |
| Siphon wall thickness | 1.5mm | 1.2mm |
One major advantage of the Prusa XL is the multi-tool capability, which allows for support interfaces to be a different material than the object being printed. This was utilized to use PLA support interfaces for the overall PCTG print, allowing for much easier support removal.

The sliced model and its wipe block, showing PCTG (white & blue) and PLA (grey).
Testing & Results:
In the process of designing the Mk II, a total of ten test prints were made. It also took several attempts at modeling it from scratch to get the hang of Fusion 360 again.
After the trials and tribulations of printing a prototype that I was happy with, it was time to test it to see how it functioned. Below is a video of the Mini Mk II in action.
As can be seen in the video above, the Mk II siphon works very well.
Possible Improvements:
At this point, I’m very pleased with the results. However, I would like to try replacing the vent pipe with a venting hole in the lower portion of the siphon, as the vent pipe both takes time to print and occupies space in the reservoir.
Conclusion:
The Mk II mini siphon was a successful effort to relearn Fusion 360 and taught us a lot about the capabilities of the Prusa XL. We look forward to applying what we learned to design a functional full-sized layering siphon for use with pints of beer.

Pingback: 3D Printing a Better Black and Tan Part 6b: Beyond The Second Layer | Doing Science To Stuff