Drip-pan or Reflector? What is the purpose of the under-element pans on the stove? In the spirit of science, and wanting the snow to go away, we will run some tests to see how long it takes to go from snow to boiling with both old and new “drip pans”.
Initial observation: Upon trying to clean the pans under the elements of our stove, and having one disintegrate, the question of what the purpose of the pans was brought up. I was under the impression that their main purpose was to catch the crap that leapt out of the pan, but, my co-blogger mentioned something about efficiency. This discrepancy is borne out on the product signage as well, as some labels just claim they are “drip pans” but others refer to them as “reflectors”.
Question: Does having new “reflectors” under the heating elements of an electric stove enhance the efficiency of heat transfer to a pot, or are they really just “drip pans”?
Expectation: I don’t expect a measurable difference. However, science is about testing hypotheses, not trying to prove that they are correct. For this test, we will use the largest pot in the house in an effort the give any reflected heat more time to create a measurable difference between the old and new drip-pan/reflectors.
Equipment & Materials:
- infrared thermometer
- snow
- scale
- pan (we used a 12 quart stock pot)
- electric stove
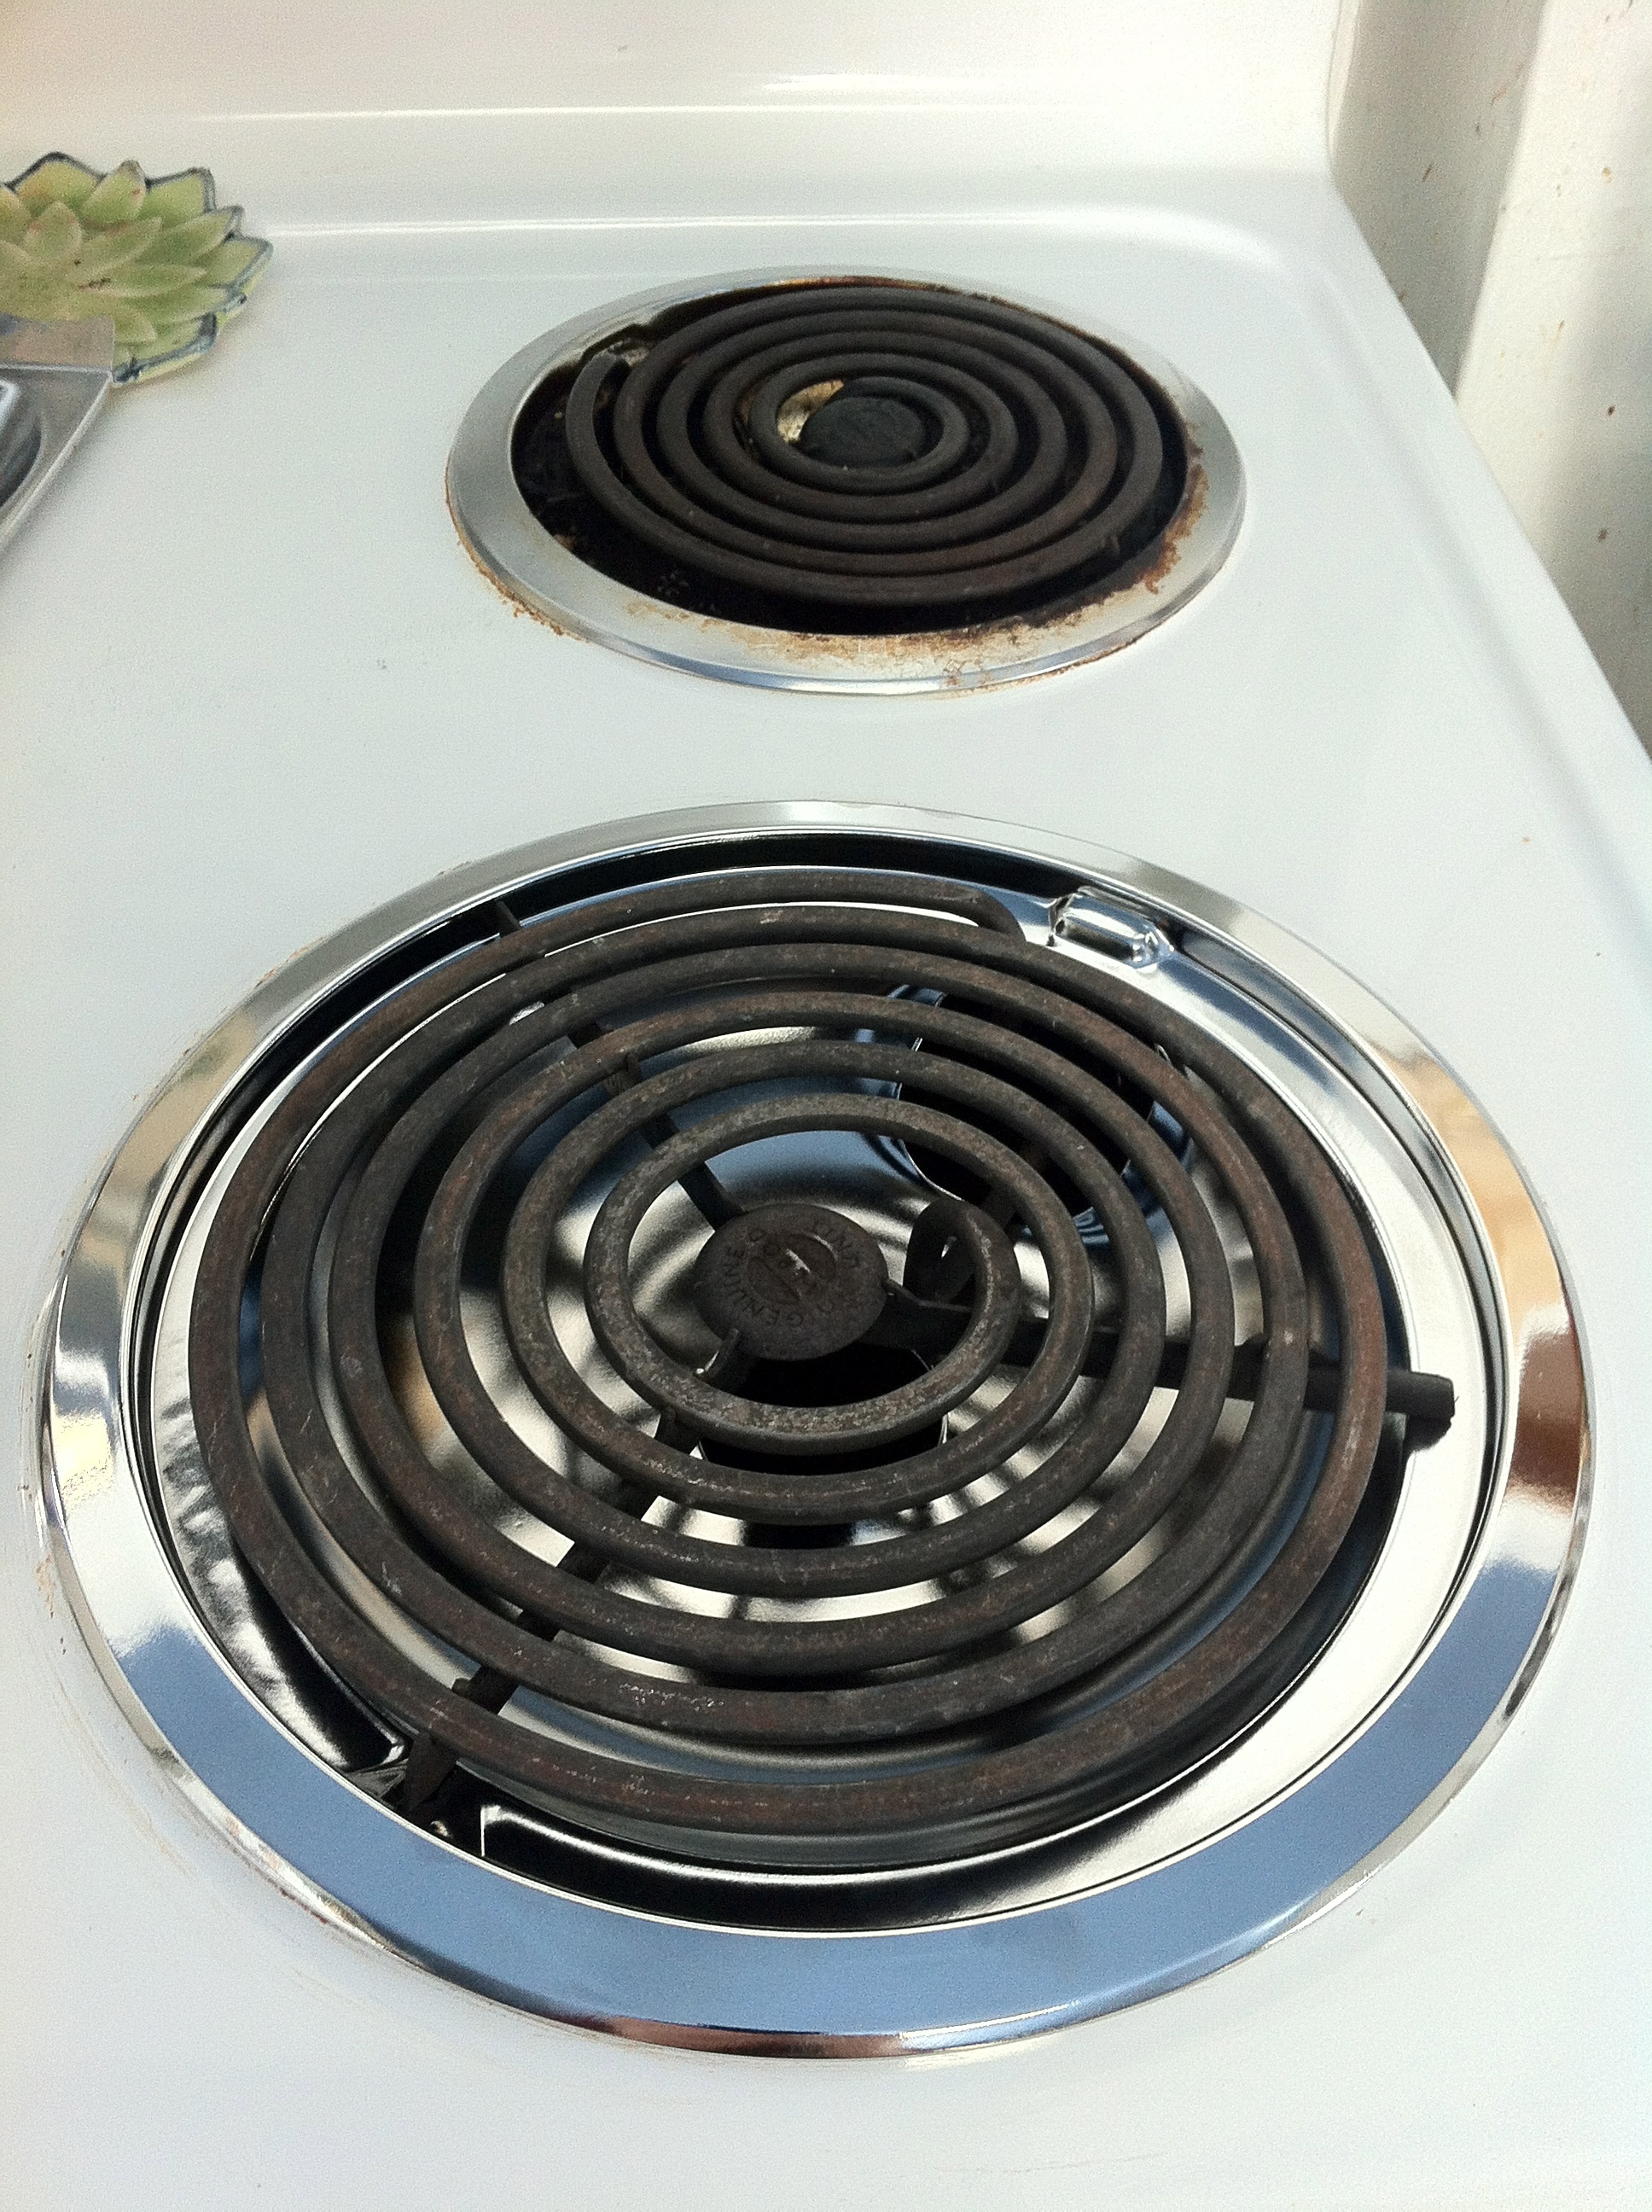
- ancient/old/rusty drip pan
- shiny new drip pan (B-compatible in our case, see Conclusion for brief discussion)
- probe thermometer
- twist tie
- metal skewer (or spoon, chopstick, etc..)
- stop watch (or similarly equipped cell phone)
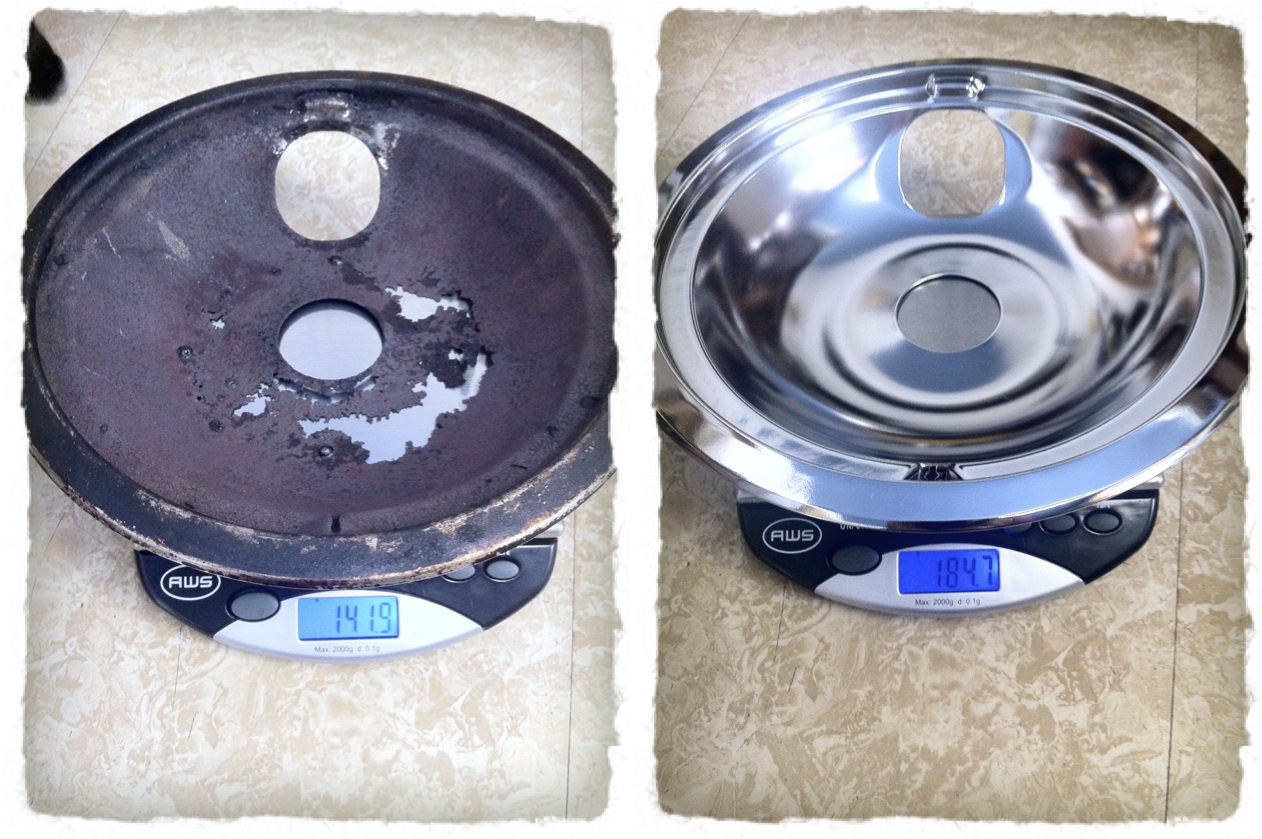
Comparison of the old and new pans. While we don’t know the actually mass of the old pan when it was new, there is a significant difference, and the amount of rust under the old pan makes a ~43g difference seem believable.
Procedure:
- take an initial reading of the temperature of the cold burner element and pan using the infrared thermometer
- place empty pan on scale, and record its mass
- place a skewer (or spoon, chopstick, etc..) across the mouth of the pan, and use the twist tie to secure the probe thermometer to the skewer. The point is to hold the thermometer probe above the bottom of the pan to avoid measuring the heat coming directly through the pan’s bottom and to avoid completely submerging the probe (specifically, we try to keep the region where the braided wire meets the solid metal probe dry, the probe gets a bit cranky when wet there). In my rig, the tip of the probe is about 2 inches above the bottom of the pan. Alternatively, recruit a spare set of hands hold the probe.
- remove temperature probe rig and set aside
- fill pan with snow, weigh again, and record the mass of the pan with snow (subtract mass of pan from step #2 to calculate mass of snow)
- insert probe thermometer and take an initial reading
- turn on stove element to “high”
- start your stop watch (or cell phone stop watch app)
- record temperature readings every minute
- take last reading & record time when water reaches 212°F (or whatever boiling is at your elevation, see “Surprise Results” for an online calculator)
- turn off stove, empty pan, and allow all to cool back down to initial readings taken in step 1
- replace old drip pan with the shiny new one
- repeat steps 2-10
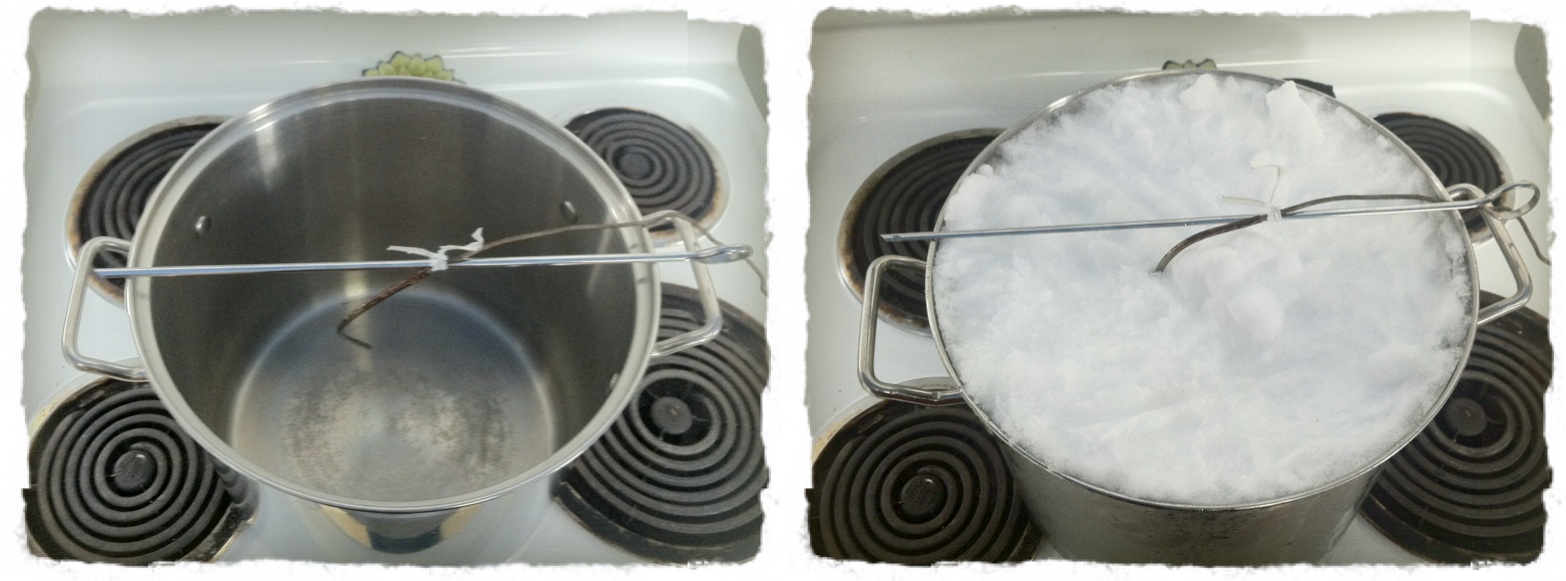
The temperature-measuring rig. The probe thermometer is held to a metal skewer with a twist tie to ensure the tip measures the water (and not the pan) and that the two trials have similar probe placement.
Data:
starting element temp: 65.2°F
starting pan temp: 64.9°F
mass of pan: 1608g (salter scale)
mass pan + snow (both trials) 5550g
mass of snow used: (both trials) 3942g
atmospheric pressure: 30.02 inches Hg
temp (outside while collecting snow): 48.6°F / 51°F
elevation: 740 ft (from topo map)
It took about 1 hour for the element to cool back to the initial temperature (65.3°F was reached at 60 minutes) to allow the start of the trial using the new drip pan.

Plots of temperature over time from “snow-to-boil” for an old/rusty drip pan and a shiny new drip pan.
From the plot above it is clear that there is a distinct difference in the heating curves between the two trials. Not only did the trial with the new pan reach a boil 2 minutes sooner, it also reached a higher max temperature by 3°F (211°F vs. 208°F).
Surprise Results:
Snow compressibility makes it very hard to work with! It is very important to mass your snow (and also why weighing flour makes more sense than using measuring cups). The same snow volume initially prepared for the second trial error-ed out my scale because it was too packed. After several attempts at removing snow, I had to dump it out and try again with gentle packing.
At our elevation water should boil at 210.86°F, rather than 212°F. Even so, our thermometer only read 208°F on the trial with the old drip pans, even though we had a vigorous boil. If you want to check the expected boiling temperature in your area, try this calculator from Thermoworks. Note that at the time of this blog post, they do not specify units for their calculator. They are expecting inches of Mercury for pressure and feet for elevation.
Conclusion:
There is a slight possibility that some of the effect may have been due to inadvertent cleaning (through friction of removal and reinstallation) of the element’s contacts between the trial with the old drip pan and the installation of the shiny new pan. This was not considered early in the experimental design, and there is no way to easily retest for that.
However, there was a measurable difference (about 2 minutes) in the time to reach a boil, and the water reached a higher temperature after the installation of the new under-element pans. At the moment, it seems that the new drip-pans actually do have an impact in heat transfer to a cooking vessel.
When picking a new electric stove pans, you will likely be faced with A, B, and C-type reflectors (plus some others that are obviously non-round). We knew we had a GE, which eliminated type A. Both B and C styles seemed to be for GE brands, and it took many minutes to figure out that the back of the “C-type” package specified that it was for models from 1924-1989 (!). While I am unsure of the age of my stove, it is definitely younger than 1989, so – Type B it was (and it fit perfectly too!).
The new drip-pans/reflectors do certainly look nicer!
Future Questions:
What effect is there (if any) when using the dark colored ceramic drip pans?
How much does that 2 minute savings in time relate to $ spent on electricity to power the burner?
If we ever get a snazzy new gas stove, how does gas compare to electric in a similar snow-to-boil experiment?

Anything to make snow go away faster! I’m really not surprised that the increased reflection helped, radient energy and all. Then again, I spend quite a bit of time fussing with light and reflection.